Do you ever get tired of hearing this age old question? I know I sure do.

When I was first married, I thought I was going to be a super-wife and prepare these amazing, delicious, gourmet meals for my husband. You know, like the ones you see in cookbooks and on pinterest.

Then reality set in.

I’m waaay to busy to be slaving over the stove. When getting home from work, the last thing I want to do is prepare a huge meal. And let’s face it, most women are; you’re tired and sometimes the easiest choice- grabbing something fast- isn’t the healthiest choice.

That’s why I am a big fan of easy, delicious, fat loss friendly recipes!

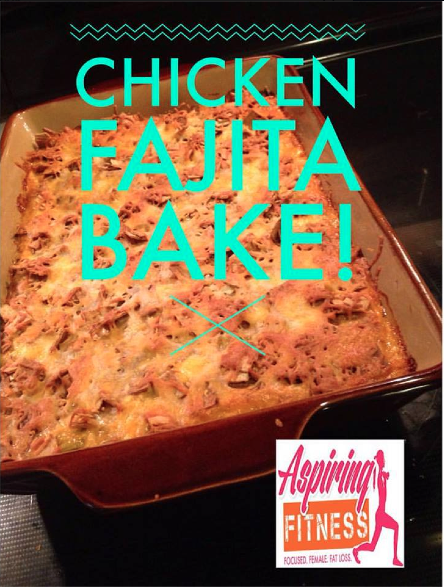
Check out what I had for dinner!!

IMG_5274

Chicken Spinach Casserole:

Ingredients:

2 cups cooked chicken
10 oz frozen spinach, thawed and drained (or a bag of fresh spinach cooked till wilted)

1 or 1 1⁄2 cups plain Greek yogurt
1⁄2 tsp salt*
1⁄2 tsp garlic powder*                 *I used garlic salt because that’s what I had on hand
1⁄2 tsp onion powder

1 packet Knorr Vegetable mix
1⁄2 cup  parmesan cheese
1⁄2 cup shredded Mozzarella cheese or mexican blend cheese

Directions:

  1.  Season chicken with salt, pepper and garlic powder and boil until cooked. (I used about 2 lbs of uncooked chicken)
  2. While chicken is cooking, grease and 8×8 baking dish with cooking spray and preheat oven to 350.
  3. Mix together yogurt and spices. Add in cheese and spinach.
  4. Once chicken is cooked, take out and cut into cubes or shred, depending on how you like it. Add to mixture. *Time Saving Tip*: While the chicken is still hot, you can shred it by using an electric or stand mixer. It works AWESOME!
  5. Spread into baking dish and sprinkle a LITTLE more shredded cheese on top. Bake for about 40 minutes or until top gets slightly brown.


I went to the Dentist the other day….

March 4th, 2015

By Katie Guinn

First of all, you may be wondering, “what’s so shocking about going to the dentist?”

Nothing really. In fact, I go everyday 😉

See, my other profession is a Dental Hygienist. I am passionate about helping people be their healthiest and happiest. I believe that being a personal trainer, nutrition coach and a hygienist allows me to do this.

NOW TO THE SHOCKING NEWS!!

As you can expect, I am very meticulous about my teeth. So when my boss (dentist) told me that I HAD TEN CAVITIES I was LIVID!!

I haven’t had a cavity in over 15 years, WTF? I mean, seriously, WTF???

So I did some digging and some research: I don’t drink soda or coke, which is notorious for causing cavities. I’m the healthiest I’ve ever been. Best nutrition, best shape. It just DOES NOT make sense.

But there was something I was wondering about.

Remember that email I sent you about BCAA’s?

I wondered if they could be the cause?

So like the good scientist that I am, I ordered some litmus paper and put my BCAA’s to the test.


And here’s the results:

FullSizeRender


WOW!! Can you believe it? A pH of TWO!! I might as well have been sucking on lemons the past year! A lemon has a pH of 2 and coke has a pH of 2.8!


This made this hygienist distraught. NO ONE had told me that this could (will) happen. My trainer at the time said it was ok to sip on BCAA’s to curb hunger and cravings, which they are great at doing. I even asked multiple trainers their opinion and they all thought it was fine.


But as a medical professional, I will tell you!!


Some easy ways to save your smile is by:

  • Drinking through a straw
  • Drink BCAA’s only during a workout
  • If not during workouts, drink them all at once. It takes your mouth 20 minutes to return to a    pH of neutral 7.
  • Don’t sip on BCAA’s or other acidic drinks: gatorades, etc.
  • Rinse thoroughly with water after drinking
  • Don’t brush your teeth right after drinking acidic drinks. Let your mouth go back to neutral before brushing. Toothpaste is abrasive and brushing will scrub off your enamel.
  • Use a high concentration of fluoride toothpaste like Colgate prevident or a Fluoride rinse daily.


Now, all that being said. BCAA’s are a great method for fat loss. Just make sure to use them carefully.


First of all, you may be wondering; “what the heck is a BCAA?” BCAA’s are an acronym for Branch Chain Amino Acids. They are comprised of Leucine, Isoleucine and Valine. These are essential Amino Acids, which means they are necessary for body function.

But what do they do?

Basically they have a branched side chain that turns the amino acid into energy. Scientifically speaking, they enter into the Kreb’s Cycle and help spin the Kreb’s cycle faster, which in turn causes you to have more molecular energy, and in layman’s terms THEY HELP YOU BURN FAT FASTER!

BCAA’s also help curb hunger and cravings. So if you’re getting a hankering for something sweet, drink some BCAA’s instead!

Other benefits of BCAA’s include:

  • They reduce muscle soreness from weight training
  • Provide muscle and energy production in workouts
  • Reduce muscle fatigue in workouts
  • Inhibits muscle cell breakdown
  • Improves insulin sensitivity
  • Curbs hunger and cravings
  • Enhance muscle protein synthesis
  • Increase fat burning and aids with fat loss
  • Supports hormone balance during intense training

My favorite brand is Scivation and I totally dig the mango flavor! It’s super yummy and totally hits the spot! Check out this supplement and other products I recommend here!!

My picky husband has been raving about my latest creation. I was experimenting with some ideas of dinner casserole types of foods that would make easy and delicious dinners. I have to admit that some experiments, turn out not so great….. But hubby was especially excited about this one 🙂 I call that a success!


Screen Shot 2015-09-07 at 11.51.02 AM

Ingredients:

3 large chicken breasts, frozen or fresh

2 cups nonfat plain greek yogurt

2 flat-out wraps

1 packet of low sodium taco seasoning

1 1/2 cups salsa

2-3 slices of fresh onion, diced

2/3 cup green or red pepper

2 cups shredded mexican cheese


Directions:

1. Cook the chicken by placing in glass dish, covering with plastic wrap and microwaving until cooked thoroughly.

2. Place the cooked chicken, while it is still hot, into a stand mixer and mix until shredded. Or you can use an electric hand mixer!

3. Cut the flatout wraps into squares with a pizza cutter and bake on a cookie sheet at 350 for 8-10 minutes or until crispy. This will make a crispy strip topping.

4. Mix the salsa, greek yogurt, taco seasoning, onions, peppers and 1 cup of cheese in a large bowl.

5. Add the shredded chicken to the mixture.

6. Spray the bottom of a 9×13 pan with cooking spray.

7. Spread chicken mixture into pain and sprinkle tortilla strip squares on top.

8. Sprinkle the remaining cheese on top.

9. Bake at 350 for 40 minutes.


Macros for 1/6th of the pan: 337 calories, 11.3g of fat, 18.3g of carbs and 39.3g of protein.


For Valentines, you can’t get enough Red Velvet deliciousness! Here’s a cleaned up version of cookies to treat your sweetie this holiday!


Ingredients For the cookies:

11⁄3 cup oat flour
2 tablespoons unsweetened cocoa powder
1⁄2 teaspoon baking soda
1⁄8 teaspoon salt
1/2 cup coconut oil, slightly melted

1⁄2 cup stevia
1⁄4 cup truvia brown sugar blend, packed
2 large eggs
1 teaspoon pure vanilla extract
11⁄2 tablespoons red food coloring*

For the filling:

4 ounces 1⁄3 less fat Neufchatel cream cheese, softened

3 tablespoons coconut oil, softened
21⁄2 cups stevia in the raw
1 teaspoon pure vanilla extract

Prepare the cookies:

  1. In a medium bowl, whisk together the flour, cocoa, baking soda, and salt. Set aside.
  2. Place the stick of butter, granulated sugar, and brown sugar in the bowl of a stand mixer fitted with the paddle attachment. Beat on medium speed until light and fluffy, about 3 minutes. Scrape down the sides and add the eggs, mixing on low speed until combined, then beat in the vanilla and red food coloring until well incorporated. Add the flour mixture and beat on low speed until just combined, scraping down the sides of the bowl as necessary.
  3. Preheat the oven to 350 degrees. Line a baking sheet with parchment paper. Roll into teaspoon sized balls and place on the prepared baking sheet 2″ apart. Bake on the middle rack of the oven for 6-8 minutes, or until the cookies appear dry on top. Cool on a wire rack for 3 minutes, then remove the cookies from the pan and cool completely on the wire rack.

Prepare the filling:

1. Place the cream cheese and butter in the bowl of a stand mixer fitted with the paddle attachment. Beat on medium high until light and fluffy, about 5 minutes. Add the sifted powdered sugar and beat on low speed until combined. Add the vanilla extract and increase the speed to medium high and beat for 3 minutes until the filling is nice and creamy. Spread or pipe the filling onto the bottom of half of the cookies, and top with the other half. Cookies should be stored in an airtight container in the refrigerator for up to one week. Enjoy!


*Note, my cookies were a slighthy dry, so next time I may add another tbsp or 2 of coconut oil.

Learning to Balance Life and Love

February 7th, 2015

By Katie Guinn

It’s the season of love! Valentine’s Day is just one week away! It’s this time of year where significant others shower each other in gifts of jewelry, flowers, and chocolates. Chocolates…. Uh oh….. Now chocolates are not conducive to fat loss. Especially when you eat the whole box in one weekend or day. Yikes!! Talk about a blood sugar spike and crash later.

But here’s a few suggestions to help you have a healthy balance for this romantic weekend.

  • Limit yourself to one splurge meal that weekend. It’s OK to have a bad meal every once in awhile. Just not every day.
  • Instead of getting or giving candies as a gift, suggest to your significant other something that you would like instead; flowers, a nice dinner, jewelry etc. I know that if I gave my husband candies or chocolates for a gift, I’d probably end up eating most of them myself. haha!! In fact, most people like suggestions, it makes it easy on them to get you something you really want.
  • If you do end up getting some candies, have a few and then take the rest to work or give them to someone. You don’t have to eat the whole box yourself! Your coworkers and your waistline will thank you.
  • Remember, it’s all about balance, not deprivation. You can do it!!
  • For some creative recipe ideas that are easy on your waistline, check out my fat loss friendly recipes here!!

Yes, you read that right! Red velvet meets healthy! Treat your sweetie to a Valentines treat that isn’t chocked-full of carbs and sugar crashes.

Healthy Red Velvet Protein Pancakes

Screen Shot 2015-02-07 at 9.54.47 AM


Ingredients:

2 cups oat flour
1 cup stevia in the raw
1/2 cup unsweetened cocoa powder
1 1/2 teaspoons baking powder
1/2 teaspoon baking soda
1/2 teaspoon salt
2 scoops vanilla protein powder
1 1/2 cups unsweetened vanilla almond milk
1/2 cup plain non-fat greek yogurt
1 teaspoon vanilla extract
2 large eggs
1/2 cup Xylitol
2 tablespoons red liquid food coloring

Directions:

  • Sift together all of the first 7 ingredients and set aside.
  • Then mix the remaining ingredients in a bowl.
  • Add the wet ingredients to the bowl of the dry ingredients.
  • Mix well with a spoon or a handheld electric mixer until smooth.
  • Pour spoonfuls of batter (I used a 1/4 cup measuring cup) onto a warmed griddle or skillet that has sprayed with cooking spray.
  • Cook until bubbles appear (3-4 minutes) and then flip.
  • Serve with sugar free pancake syrup or eat plain. They are good either way!
  • Note* This makes about 16 small pancakes, recipe can be halved!


Nutrition Info: calories 61, Total Fat 1 g, Total Carbohydrate 11 g, Dietary Fiber 1 g, Protein 4 g, Sugars 2 g

*Note if you use Stevia in place of Xylitol, the carbs and calories will be less!

Chicken and Broccoli Cheesy Casserole – Low Carb Recipe

Ingredients:

3 cups cubed chicken
16 oz (1lb) bag of frozen broccoli
1 med onion diced (about 1 cup)
2 cups shredded mozzarella cheese
1 tsp garlic powder
1 cube chicken bouillon – I use the sodium free packets
1/2 cup water (optional, I added this to help disperse the chicken flavoring but the water from the veggies as they cook also would suffice if the dish seems too watery to you)
1 Tbsp olive oil or melted coconut oil
1/4 tsp pepper (or to taste)
1/4 c greek yogurt
1 cup ricotta
Cooking Spray
Directions:

– Grease a 9 x 13 inch casserole pan

– Add broccoli, onion, chicken bouillon, water, olive oil and pepper to a medium frying pan. Cook covered for about 10 minutes. Stir occasionally.
– In a medium bowl mix the chicken chunks, garlic powder, sour cream and ricotta cheese together. Mix till blended. After 10 minutes of cooking the veggies, pour the broccoli mix into the bowl with the chicken. Stir until blended.
– Add 1/4 c of the shredded mozzarella cheese to the mix. Stir.
– Transfer your mix to the greased pan and spread evenly.
– Add the remaining mozzarella cheese to the top and pop that baby in the oven!
– Bake at 350 degrees for 50 – 60 minutes. Once the top layer of cheese is browned a bit it should be done.   If you like your broccoli on the softer side bake until the florets are to your liking.

Let’s face it, we are busy women. Life is hectic, work is stressful, family can be stressful. All of the daily things that we have to do pile up and it gets overwhelming.

But I want you to take time for yourself. Do something daily, by yourself that lets you unwind and relax. It’s important for our health to take care of ourselves mentally, physically, emotionally and spiritually.

I’ve personally started a new habit for the end of the week. As some of you may know, I’m a dental hygienist by day and a nutrition coach on the side. My passion is helping people become their healthiest. But my job takes a toll on my body, and dealing with cranky people who tell you that they hate coming to see you, takes a toll as well.

My new habit is this; I take a relaxing epsom salt bubble bath, turn the lights off, light an aromatherapy candle, play some relaxing music and pour myself a glass of my favorite wine.

Why? Because it’s something I NEED to do for ME. I am not being selfish by doing this in any way. I just need that time to decompress and destress. That allows me to be the best wife to my husband and the best person I can be to others.

How do you destress?

Exercise? Long walks? Cup of Coffee?


IMG_5281

I’ve been experimenting in the kitchen lately. I don’t know why, maybe because it’s winter? Who knows. But I’ve got another delicious treat for you 🙂

Oatmeal Peanut Butter Chocolate Chip Cookies


Ingredients:

  • 2/3 cup  oat bran
  • 1/2 teaspoon ground cinnamon
  • 1 teaspoon baking soda
  • 1 large egg
  • 1 cup peanut butter
  • 6 Tablespoons brown sugar substitute; Ideal, etc
  • 1/2 cup  semi-sweet or dark chocolate chips
  • 1 tsp vanilla extract

Directions:

In a medium bowl toss the oats, cinnamon, and baking soda together. Set aside. In a stand mixer, beat the egg. Mix in the peanut butter and brown sugar until combined. Pour in the dry ingredients and slowly mix until everything is combined.  Fold in the chocolate chips.

Chill the cookie dough for 30 minutes.

Preheat oven to 350F degrees. Line two large baking sheets with parchment paper. Scoop the dough, and roll into balls and place onto prepared baking sheet. Bake two batches – 7 cookies on each baking sheet. You can gently press down on the dough mounds with the back of a spoon to slightly flatten or leave in ball form. If you find the cookie dough balls are oily-looking from your peanut butter, blot each with a paper towel.

Bake for 7 to 10 minutes. The cookies will look very soft and underbaked, but that’s ok. For crispy cookies, bake for up to 12 minutes. Sometimes I press a couple more chocolate chips into the tops of each cookie immediately after coming out of the oven. This is optional and only for looks!

Allow the cookies to cool for 10 minutes on the baking sheet before transferring to a wire rack to cool completely. Cookies stay fresh stored covered at room temperature for up to 7 days, if they last that long! Cookies freeze well, up to 3 months.